Saturday, May 28, 2011

WINNER!!

Thank you soooo much to everyone who took the time to vote for our band.  I can't even tell you how much that meant to me.  Our band is "older" people and we play for "older" people....lots of times the people at our shows don't even have email.  When we are competing with the younger people...well, they can just send out a text to all their friends and just like magic the votes come pouring in.  That just makes the results even sweeter for us, we made it to #9 out of 365 bands.  Top Ten....WOO HOO!

And, now for the winner of my shoe flowers.....drum roll please.....


I just love Karie's blog.  She is so creative and I think that we have tons in common.   

Thank you to everyone who commented and voted....I'm sending you ALL virtual HUGS AND KISSES!

Sunday, May 8, 2011

I'm giving these away!!!

Yes!  These beautiful Flowers can be yours!

Here they are on a pair of sandals:


I'm in a Classic Rock band called Crystal Image and we were voted #11 last year on KCRA's "A List".  Right now we are number 8 and the voting ends on May 18.  Would you take just a minute to vote for us?  I would be so very grateful!!
click here to vote:  http://ctvr.us/crystalimage

All you need to vote is an email address, and you don't have to live in this area. 

If you do vote for us, leave me a comment and I will draw a name from the comments and send you this pair of Shoe Flowers that I made.  They are fabulous (if I may say so myself) and they go on anything. They would look great on a pair of flip flops, sandals, as a bracelet or necklace, pinned on a sweater or tied on to your purser. And, if you already voted....THANK YOU!  And, yes, of course you can enter!

And....if you post my giveaway on your blog, I will add your name in twice, for a total of 3 entries!!!
Recap:
Vote for the band =  1 entry   
(leave a comment to let me know that you voted...thanks!)

Share on your blog = 2 entries  
(let me know in your comment that you shared..thanks!)


Drawing will be on May 19th
If you want to read more about our band, check out my other blog:  http://stephaniesbandblog.blogspot.com

Thank you thank you thank you!!

Stephanie

05-11-11 P.S.  Voting update.  I want to thank all of you out there in the blogging world for helping me!!  We are hovering at our position, the voting is intensifying this last few days.  Without your votes I'm sure we would be moving in the wrong direction!   Only 7 more days!

Tuesday, April 26, 2011

Shoe Bling

I went shopping for shoes....again.  They can put a man on the moon, but they can NOT make a truly fabulous, cute shoe that is comfortable!  Why???  

I saw so many shoes that I wanted, but I just can't wear them anymore.  I love all the embellishments that are in style right now.  This pair costs only $395.  What?  That's just a little out of my budget, and I could never walk in them.  


As I was shopping, I started to get an idea.  I could buy the comfortable shoes and embellish them myself.  I couldn't wait to get started.   I decided to start with fabric flowers.  I found a tutorial on youtube:

http://www.youtube.com/watch?v=JEbpMvAGs5k  I learned what I needed to know and made this flower:


I decided that it wasn't necessary to cut circles, so I just cut squares.  Just bein lazy I guess.

I cut about 3 or 4 sizes.


Next step was to singe them with a lighter.  I used up the small one and finished with the long one.  I will use the long one from now on, the small one hurts my thumb after a while.  But, the long one tends to be too much, so be careful.  It can do way more than singe if you aren't.


Here's all the pieces.   The large one was to flat so, I clipped it in a few places and singed again.  That did the trick.  I did the same thing on the smallest pieces. 


Here you go, two finished flowers.  I put a few small red beads in the middle.


Then I sewed the flowers to a piece of ribbon.  


Here is my new sandal.   Very comfy!


I just tied the ribbon in a bow, under the flower.


Ta Da!!


How cute are they?  I can't wait to wear them. 

I will definitely make more of these!!

Now all I need is for the weather to co-operate and get warm!!

I won!!

I'm a lucky girl!!!  I had a wondrous journey through blogland with the One World One Heart tour.  It was my third year in a row.  It was truly amazing to see all the creativity out there!!  Every blog (there were over a thousand) had a giveaway.  I was so blessed to have received the following treasures:


This stunning necklace was sent to me from Cheryl.  I love hearts and I will wear this one close to mine!!


A closer view!  You can visit Cheryl at cherylstrait.wordpress.com
 

This wall hanging found it's way to me all the way from Australia.  Beautiful Artwork, I love it in so many ways!  The wonderful charms that hang down, the colors, it's just beautiful!   To see more visit:  Roz at rossylalah.blogspot.com


This artistic card was sent to me by Robin.  I love blue  and this picture just makes me happy!  You can visit Robin at http://urbandebris.typepad.com/urban_debris_journal/

I'm sorry that it took me so long to share.  

Eco/shopping bag instructions

I said a while back that I would put instructions here for the bag that I gave away on the One World One Heart tour.  Each time I write them, I get myself confused.  But here goes!


First the bag:


I made these for gifts and I wanted to use "eco friendly" as my theme.   I had this handy little shopping bag and it became my inspiration.


Here is it all folded out. 


So, I figured what is more eco friendly than using a bunch of fabric that I already have?  I looked through my stash and found this huge piece of fabric that I bought for a project that I never finished.  There was a LOT of it!


So, I just cut a couple of large pieces to get started.


The bottom was the fold, so I would only need to sew up the sides.


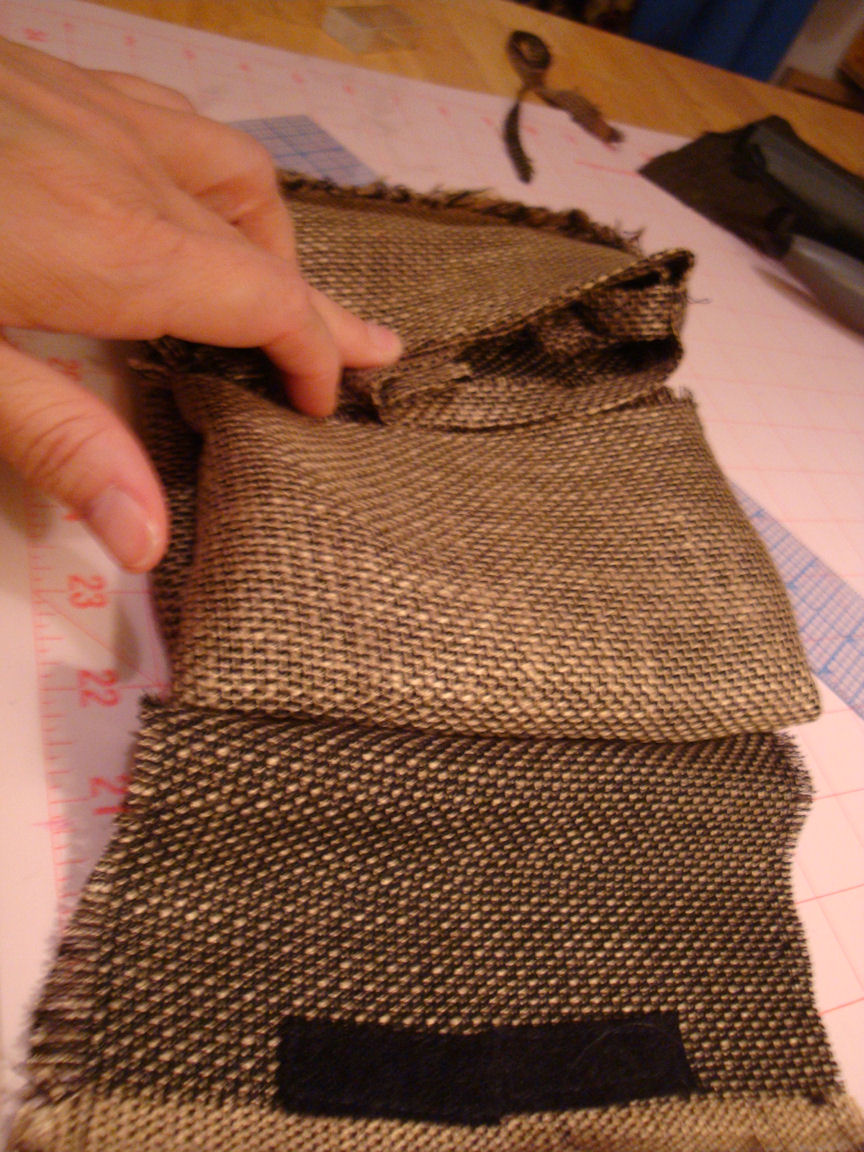
This fabric would look cool on either side.  I even ended up mixing the sides for variation.


On the top I just folded under, ironed it and sewed.  


I ended up folding under twice.  It looked better and seemed sturdier.


I sewed the sides up.  On the next few bags I ended up making french seams.  That made the bags pretty much reversible and sturdier.


So there is the basic bag.


I used the same fabric to make the straps.  You can make them any length you like.  I just made them the length of the fabric that was left over when I cut out the bag.


I made two strips about 2-3 inches wide.

Folded.


again


and ironed.


Then I sewed each strap.

 This is the outside pocket.  I just wanted something big enough to put a magazine or such in it.  


Some velcro to hold it closed.


This is where the inspiration piece came in handy.  There was a flap that made the bag stay rolled up small.


I sewed the soft side of the velco on the top of the outside pocket, and the sticky side on the inside of the flap.  That was so that the velcro on the outside of the bag would "catch" on everything.   Do the flap, but wait on the pocket so you can put it in just the right spot.


I sewed the flap on to the pocket before I sewed the pocket on to bag.  As I made more bags, I realized that the pocket should go on before I sewed up the sides....much easier. 

Then I sewed in the straps.  I folded the bag first to decide where I wanted the straps.


I made the little box with the x inside to make the handles sturdy.

This fabric frayed very easily.  I decided to make that a feature in my design and I pulled all the threads around the pocket and the flap. 


Getting ready to fold it up and decide where the pocket velcro would need to be.  

Fold each side in.


And then fold the entire bag twice, so it's in thirds.

With the flap out.


fold it up.


That's where your matching velcro needs to be.
Sew it on and you are done!
Here is another one with the wrong and right side of the fabric mixed up.   I like the way it turned out. 


They are really cute if you fold them up with the handles out.  


Hope that works for you.